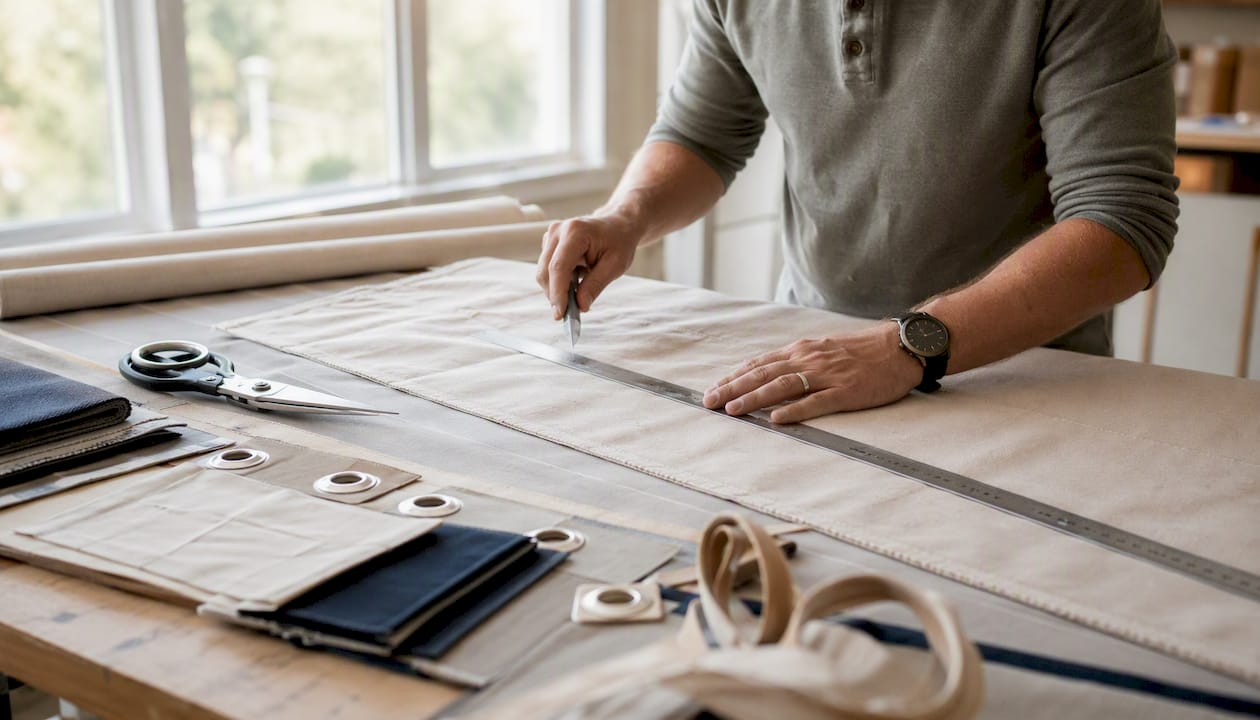
A repeatable custom boat cover build follows this sequence: select a marine-grade fabric, create a full-size reinforced pattern with Duraskrim or equivalent grid plastic, merge and cut panels, sew flat-felled seams with V-92 UV-bonded polyester thread, fit vents and a support frame, then install with shock-absorbing anchors. From first measurement to final tensioning, most solo builders complete a small-to-medium boat cover within a few days or weeks of dedicated work. Materials for a typical 25-foot sailboat or center console involve moderate costs depending on fabric choice and hardware.
Before you start cutting anything, work through this sequence:
- Gather fabric samples and confirm GSM, UV rating, and coating
- Pattern dockside or on the trailer using reinforced plastic
- Build a scrap-fabric mockup and verify fit
- Cut final panels and sew with marine thread and a heavy-duty machine
- Install vents, grommets, and hem channels
- Tension and anchor with shock-absorbing tie-downs
The sections below walk through each stage in detail, with time estimates and a cost table near the end.
Table of Contents
- What materials and tools do you need for a DIY boat cover?
- How do you measure and pattern a boat cover accurately?
- Why should you build a mockup before cutting final fabric?
- How do you cut panels and sew a durable boat cover?
- How do vents and cover shape prevent mold and moisture buildup?
- Which frame or support system works best for your boat?
- How do you anchor a boat cover to prevent chafe and grommet failure?
- What is the step-by-step installation sequence for a finished cover?
- How do you maintain a DIY boat cover and fix common problems?
- What does a DIY boat cover project actually cost and how long does it take?
- Where can you buy marine fabric and tools in the U.S.?
- Key Takeaways
- The part most tutorials skip: realistic expectations for first-time builders
- Beautifulwindowselgin supports your boat cover project from fabric to finish
- Useful sources for further reading and video walkthroughs
What materials and tools do you need for a DIY boat cover?
Getting the materials list right before you pattern saves at least one return trip to the supplier. Here is what the project actually requires.
Marine-grade fabric
Marine-grade fabrics such as Sunbrella and Docril are the standard for custom boat covers because they resist UV degradation and water penetration in ways that standard tarps cannot match. Cheaper tarps fail early under sun and salt exposure, often within a single season. When comparing options, prioritize fabrics rated for outdoor UV exposure and sufficient GSM appropriate for trailered boats or boats stored in harsh climates. Sunbrella is an acrylic-based solution-dyed fabric with strong colorfastness; Docril is a comparable acrylic canvas that many canvas shops use for its balance of hand and durability. Both are available by the yard from U.S. suppliers. The durable outdoor fabric collection at Beautifulwindowselgin covers the 250–600 GSM range, which maps directly to the weight bands used in marine cover work.
Thread, needles, and machine requirements
V-92 UV-bonded polyester thread is the correct choice for marine seam integrity. It resists UV breakdown and salt, and it holds tension through seasonal expansion and contraction. Pair it with a size 18 or 20 needle for most marine canvas weights. Standard home sewing machines typically cannot handle multiple plies of marine canvas; a heavy-duty machine with a zig-zag stitch and a walking foot is the minimum. Sailrite-style machines and industrial walking-foot machines are the preferred tools for this work because they feed thick fabric evenly without skipped stitches.
Hardware and small tools
- Marine brass or stainless grommets (size #2 or #4 depending on rope diameter)
- Seamstick or basting tape for panel alignment before sewing
- Hot knife or rotary cutter for clean, sealed edges on synthetic fabric
- Grommet setter and anvil, rivet set
- Mushroom vents or through-cover vent bases
- Drawcord or 3/8-inch rope for hem channels
- Rubber balls or purpose-made shock absorbers for anchor points
- Support poles or PVC pipe for the frame
Pro Tip: Order an extra half-yard of your chosen fabric and request swatches of two or three colorways before committing. Sew a test seam on layered scrap with your actual thread and needle to confirm tension and stitch quality before you cut a single panel.
How do you measure and pattern a boat cover accurately?
Patterning is the single most consequential step in the entire build. A mistake here is effectively permanent once you cut the final fabric.
Patterning dockside or on a trailer is far more efficient than working on a cradle. You can walk both sides of the hull, reach the rub rail, and mark deck details without contorting around support stands. Set up on a calm day with the boat level.
Dockside measuring checklist
Start by establishing reference lines before you drape any plastic:
- Centerline: run a string or chalk line from bow to stern along the deck centerline
- Hem line: mark where the cover will terminate at the rub rail or below it
- High points: note windshield tops, console height, and any hardware that will create a tent point
- Vent locations: identify the highest interior points above cabins or consoles
- Rope exit points: decide where drawcord will exit the hem channel
Patterning with Duraskrim
Duraskrim or reinforced grid patterning plastic is the correct material for full-size templates. Cheap construction plastic stretches under its own weight, producing templates that are inaccurate by the time you transfer them to fabric. Duraskrim holds its shape, flattens cleanly on a cutting table, and can be stored and reused for future repairs.
Drape the reinforced plastic over the hull section you are patterning. Secure it with strapping tape or Seamstick along the centerline first, then work outward. Add relief cuts at curves so the plastic lies flat without bunching. Mark seam allowances (typically 1 inch), reinforcement zones at high-chafe areas, and vent openings directly on the plastic. Once each panel is marked, number it, note which side faces up, and mark the grain direction.

Pro Tip: Write “INSIDE,” “OUTSIDE,” and an arrow indicating the centerline on every panel before you remove it from the boat. Panels that look identical on a table are easy to flip or swap; these marks prevent a frustrating rework.
Why should you build a mockup before cutting final fabric?
A mockup built from inexpensive muslin or scrap canvas catches fit problems that look fine on paper. Adding 12–18 inches for hems and shaping is standard practice, but the mockup reveals exactly where those allowances need to go.
- Merge scrap panels using the Duraskrim templates, cutting rough shapes with a 2-inch margin beyond the marked seam lines.
- Drape the merged mockup over the boat and pin or tape it at the centerline.
- Walk the perimeter and identify tenting areas, stress points, and any spots where the cover pulls away from the hull.
- Mark hem depth, vent placement, and tie-down routes directly on the mockup with chalk.
- Transfer adjustments back to the Duraskrim pattern pieces before cutting final fabric.
Patterning on the trailer during the mockup stage gives you the same access advantage as the initial measurement session. If a panel needs a dart or a relief cut, make the change on the pattern, not on the final fabric.
Pro Tip: Use a contrasting color of chalk or paint marker on the mockup to map every adjustment. When you transfer changes to the Duraskrim pattern, the color contrast makes it easy to see what changed versus what was original.
How do you cut panels and sew a durable boat cover?
With a verified pattern and a tested mockup, cutting and sewing becomes a methodical process rather than a guessing exercise.
Merging panels and aligning grain
Lay the Duraskrim templates on the final fabric with grain lines parallel. Use Seamstick basting tape along the seam edges before sewing; this holds panels in alignment through the machine without pins that can distort thick canvas. Sew the center spine first, working from bow to stern, then add side panels outward from that spine.
Seam construction
A flat-felled seam is the strongest option for marine covers. It encases the raw edge, doubles the fabric at the seam line, and distributes stress across two rows of stitching. A top-stitched seam is faster and adequate for lower-stress areas like the bow taper. Use a stitch length of 4–5 mm with V-92 thread and confirm tension on layered scrap before committing to full panels. Heavy-duty machines with zig-zag capability produce more durable seams than standard home machines on thick marine canvas, particularly at the multiple-ply intersections where seams cross.

Edge finishing
Fold and sew a hem channel wide enough for your drawcord (typically 1.5 inches). Insert the rope before closing the channel, leaving exit points at planned grommet locations. Set grommets at 12–18 inch intervals along the hem, reinforcing each with a small backing patch of the same fabric on the inside face. High-chafe areas at the rub rail or hardware contact points get an additional layer of fabric or webbing sewn over the hem.
Pro Tip: Test a flat-felled seam on a four-layer scrap of your actual fabric using the exact stitch length, thread, and tension you plan to use on the cover. If the machine skips stitches or the seam puckers, adjust needle size or presser foot pressure before you sew a single panel.
How do vents and cover shape prevent mold and moisture buildup?
A cover that traps moisture is worse than no cover at all. Properly positioned vents and breathable fabrics reduce condensation and mold risk under covers, but placement and crown geometry determine whether the system actually works.
Place vents at the highest point of the cover, directly above cabins, consoles, or any enclosed space. Hot, moist air rises; a vent at the peak lets it escape rather than condense on interior surfaces. Mushroom vents and bolt-in vent bases are the two most common options for DIY covers. Mushroom vents snap through a cut opening and require no additional hardware; bolt-in bases accept a removable vent cap and are more secure in high-wind conditions.

Crown geometry matters as much as vent placement. A flat cover pools water at every low point, which stresses seams and can collapse the cover onto the deck. Shape the support frame or ridgeline so the cover peaks at the centerline and slopes toward the hem on both sides. Even a modest 6–8 inch rise from the gunwale to the centerline sheds rain effectively and reduces the load on any single seam.
Pro Tip: Plan vent locations during the patterning stage and mark them on the Duraskrim template. Cutting vent openings after seams are sewn risks placing a vent directly over a seam line, which weakens both the vent installation and the seam.
Which frame or support system works best for your boat?
The frame keeps the cover off the deck, sheds water, and determines how much wind the cover catches. The right choice depends on boat type, storage conditions, and how much fabrication you want to do.

| Frame type | Best for | Durability | Ease of build | Typical cost range |
|---|---|---|---|---|
| PVC pipe | Small skiffs, trailered boats | Moderate (UV degrades over time) | Easy to cut and fit | $20–$30 |
| Wood battens | Custom shapes, cabin cruisers | Good if sealed | Moderate | $30 |
| Metal tubing | Large boats, long-term storage | High | Harder to shape | $80–$200 |
PVC is frequently favored by DIYers because it cuts with a handsaw, bends with a heat gun, and costs very little. The tradeoff is UV degradation over several seasons; wrapping PVC with fabric or tape extends its life. Wood battens allow more custom shaping for complex hull profiles but require sealing to resist moisture. Metal tubing is the most durable option and the hardest to work with without a pipe bender.
Key considerations when choosing:
- Match frame height to the boat’s windage profile; taller frames catch more wind
- Use end caps and cross-bracing at pipe connection points to prevent rotation
- Attach the frame to deck hardware, not to the cover itself, so the frame stays put if the cover shifts
Pro Tip: Keep the ridgeline pitch moderate, roughly 6–10 inches of rise for every 4 feet of beam. A steep pitch sheds water well but increases windage dramatically; a shallow pitch reduces wind resistance but risks pooling.
How do you anchor a boat cover to prevent chafe and grommet failure?
Anchoring is a system problem. Weighted water jugs or rubber balls integrated into the hem maintain consistent tension and reduce chafe compared with direct rope tie-offs, which create point loads that abrade both the cover and the boat.
The hem drawcord channel is the foundation of the anchoring system. Route the drawcord through the hem, exit it at grommet points, and tie off to winches, cleats, or reinforced deck hardware. Never tie to a thin stanchion base or a plastic fitting; these fail under sustained load. Where the rope contacts the hull or rub rail, add a chafe guard of webbing or leather.
Anchor checklist:
- Place grommets every 12–18 inches along the hem, with extras at corners and high-load points
- Plan at least 6 tie-down points for a 20-foot boat; add 2 per additional 5 feet of length
- Use rubber ball connectors or purpose-made shock absorbers between the grommet and the tie-off point
- Protect every rope-to-hull contact point with a chafe pad
Pro Tip: Sew a short elastic loop behind each grommet before setting it. The loop absorbs gust loads before they transfer to the grommet barrel, which is the most common failure point on DIY covers.
What is the step-by-step installation sequence for a finished cover?
Installation done out of sequence produces asymmetric tension that stresses seams and pulls grommets. Work from the center outward, every time.
- Position the finished cover over the boat with the center spine aligned to the deck centerline.
- Install one temporary hold at the bow, one at the stern, and one at each beam midpoint.
- Set the center snaps or grommets along the spine first, working from bow to stern.
- Work outward from the spine to the port and starboard hem simultaneously, keeping tension equal on both sides.
- Secure the stern hem last, pulling aft to remove any forward slack.
- Attach shock-absorbing anchors at all grommet points.
- Check vent operation, hem drawcord smoothness, and hardware security before leaving the boat.
Pro Tip: Install one temporary hold at each quadrant before tensioning any of them permanently. This distributes the blank evenly and prevents the cover from walking to one side as you tension, which is the most common cause of asymmetric fit.
How do you maintain a DIY boat cover and fix common problems?
A well-built cover lasts 5–10 years with routine care. Most failures are preventable with seasonal inspection and a few straightforward repairs.
Routine maintenance:
- Rinse with fresh water after salt exposure and after heavy rain to remove residue
- Inspect seams and grommets at the start and end of each storage season
- Reapply a fabric protector (such as 303 Aerospace Protectant or a Sunbrella-compatible spray) annually
- Store the cover dry, rolled rather than folded, to prevent crease lines that trap water
Common failure modes and fixes:
- Flapping: usually caused by insufficient tension or a failed shock absorber; re-tension the hem and replace worn elastic loops
- Pooling: indicates a flat or sagging frame; add a support pole or raise the ridgeline
- Mildew: clean with a diluted bleach solution (follow the fabric manufacturer’s ratio), rinse thoroughly, and dry before re-storing
- Seam abrasion: apply a seam sealer rated for marine fabric and add a reinforcement patch on the inside face
- Grommet failure: replace with a larger grommet and a backing patch; never re-set a grommet in the same hole without reinforcement
Repair vs. replace: if more than 30% of the seam length shows abrasion or if the fabric has lost its water-repellent coating across large sections, replacement is more cost-effective than repeated patching.
What does a DIY boat cover project actually cost and how long does it take?
| Item | Estimated cost range |
|---|---|
| Marine fabric (Sunbrella, Docril, or equivalent), per yard | $15–$35/yard |
| Total fabric (20–25 ft boat, including 12–18" overage) | $150–$200 |
| V-92 thread, needles, Seamstick | $20–$30 |
| Marine grommets, hardware, rope | $30 |
| Mushroom vents (2–4) | $20–$30 |
| Frame materials (PVC or wood) | $20–$80 |
| Shock absorbers / rubber balls | $10–$25 |
| Machine rental or heavy-duty machine access | up to $150 |
| Optional: professional sewing for complex panels | $50–$200 |
| Total project range | $300–$1,000 |
Time estimates vary by boat size and whether you work solo or with a partner:
- Measuring and patterning: 4–8 hours
- Mockup build and fit check: 3–6 hours
- Cutting final panels: 2–4 hours
- Sewing (seams, hems, grommets, vents): 8–18 hours
- Installation and final adjustments: 2–4 hours
A two-person team cuts total time by roughly a third, particularly during the patterning and installation stages.
Where can you buy marine fabric and tools in the U.S.?
Sourcing the right materials before you start patterning prevents mid-project delays. Here is a practical supplier route for U.S. builders:
- Marine fabric by the yard: Beautifulwindowselgin stocks durable outdoor and marine-weight fabrics in the 250–600 GSM range, available with nationwide shipping. Request swatches before ordering yardage to confirm hand, coating, and colorfastness.
- V-92 thread and sewing supplies: marine canvas suppliers and Sailrite carry V-92 thread, marine needles, and Seamstick basting tape.
- Heavy-duty sewing machines: Sailrite machines are available for purchase or rental through their U.S. dealer network; some local canvas shops rent time on industrial machines.
- Grommets and hardware: marine hardware suppliers and online retailers stock brass and stainless marine grommets in standard sizes.
- Vent hardware: mushroom vents and bolt-in vent bases are available from marine chandleries and online.
When ordering swatches, request overlapping samples of your top two or three fabric candidates. Sew a test seam on each with your planned V-92 thread and needle before committing to yardage. Look for colorfastness under direct sunlight, a firm hand that resists stretch, and a coating that beads water immediately. The marine fabric checklist at Beautifulwindowselgin covers the specific attributes to evaluate when comparing options. Understanding how fabric weave and UV protection interact is also worth reviewing before finalizing your fabric choice.
Key Takeaways
A successful DIY boat cover build depends on disciplined patterning with reinforced material, marine-grade fabric and thread, a verified mockup, and a shock-absorbing anchor system that distributes load rather than concentrating it at single tie points.
| Point | Details |
|---|---|
| Pattern with reinforced material | Use Duraskrim or equivalent grid plastic to prevent stretch and produce accurate, reusable templates. |
| Choose marine-grade fabric | Sunbrella or Docril at 250–600 GSM outlasts standard tarps by several seasons under UV and salt exposure. |
| Build a mockup first | A scrap-fabric trial cover reveals fit problems before you cut final fabric, saving material and time. |
| Anchor with shock absorption | Rubber ball connectors or elastic loops behind grommets prevent the chafe and grommet failure that end most DIY covers early. |
| Beautifulwindowselgin as fabric source | Beautifulwindowselgin offers marine and durable outdoor fabrics by the yard with swatch ordering and nationwide shipping. |
The part most tutorials skip: realistic expectations for first-time builders
Most how-to guides present the patterning stage as a quick afternoon task. It rarely is. For a first build on a boat with a complex deck profile, a windshield, and a center console, patterning alone can consume a full weekend. The Duraskrim panels need to be draped, taped, marked, removed, and flattened before you even know whether your seam lines are correct. Then the mockup reveals that two panels need relief cuts you did not anticipate, and the pattern goes back on the boat for a second fitting.
That is not a failure. That is the process working correctly.
Where builders genuinely lose time is in trying to shortcut the mockup stage. Cutting final Sunbrella or Docril without a verified fit is the single most expensive mistake in this build. A yard of quality marine fabric costs $15–$35; a miscut panel wastes both the material and the hours spent sewing it. The mockup is not optional.
For boats with pronounced compound curves, consulting a canvas shop for the most complex panel can be beneficial. A professional can sew a single curved panel and hand it back to you for integration into a DIY build. That hybrid approach keeps costs manageable while avoiding the frustration of a panel that will not lie flat no matter how many darts you add.
Beautifulwindowselgin’s fabric specialists can help with yardage estimates and fabric selection for builders who want guidance before placing an order. Ordering swatches first and testing them with your machine and thread is the most reliable way to confirm compatibility before committing to full yardage.
Beautifulwindowselgin supports your boat cover project from fabric to finish

Beautifulwindowselgin offers marine and heavy-duty outdoor fabrics by the yard, with GSM options spanning the full range used in custom boat cover work. The durable outdoor fabric collection includes water-resistant and UV-rated textiles suited to the demands of trailered and moored boats alike. Swatch ordering is available, so you can test hand, coating, and colorfastness before committing to yardage. Fabric specialists are available for consultation on yardage estimates and fabric compatibility for specific project requirements. Nationwide shipping means the right material reaches you regardless of where the boat is stored. To get started, browse the fabric collection, request swatches of your top candidates, and contact the team for a yardage estimate tailored to your boat’s dimensions.
Useful sources for further reading and video walkthroughs
These resources provide visual verification, dockside patterning demonstrations, and advanced seam tutorials that complement the written workflow above:
- How to Make a Boat Cover (Soundings Online) — practical account of a full DIY build with anchoring and vent guidance
- E32-3 DIY Winter Boat Cover, Part 1 — dockside patterning walkthrough with photos for visual learners
-
— video walkthrough useful for visual verification of seam and installation technique
Recommended
- Types of Marine Fabrics: A Practical 2026 Guide – Fabric Store in Columbia, SC | Drapery Making Services
- Marine Fabric Checklist: Select the Right Boat Upholstery – Fabric Store in Columbia, SC | Drapery Making Services
- Upholstery Fabric Workflow: A Step-by-Step Guide – Fabric Store in Columbia, SC | Drapery Making Services
- Curtain Fabric Selection Guide 2026: Pick Styles That Last 30% Longer – Designer Fabrics by the Yard | Drapery Making Services